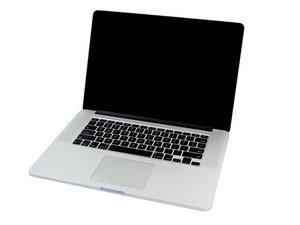
Just completed replacing the keyboard on the 15" Retina MBP (A1398, late 2012, early 2013). I found this article to be quite helpful. A few extra notes I thought I'd add;
1. I found the keyboard and screws on eBay, the screws are the standard PH #000 screws that are used in the unibody MBP. You'll need 101 new screws for the 15" Retina MBP after all the rivets are removed.
2. Don't try to take the battery out, it can stay where it is, it's glued in and it isn't at all fun to remove.
3. There are two black PH #000 screws at the bottom of the keyboard, one on each side of the ribbon cable (under the battery connections). You'll have to remove them before you take the keyboard out. Those 2 plus the new 101 screws, make for a total of 103 screws.
4. Make sure you completely remove the display, when you take out the keyboard and all the rivets come flying out, it's very easy to get parts of the rivets/metal shavings on the display (when the display is closed it's right under the keyboard). Wouldn't want any scratches on that perfect retina image!
5. After you've completely removed the keyboard, you'll find that some of the rivets were stuck in the holes where the screws will go, and the rivet head is now missing. You'll want to remove as many as you possibly can, or the keyboard will give a little in the places where you can't screw it in.
I laid the top palm rest face down on a flat surface and used a flat head screw driver and hammer (angled the flat head @ ~45 degrees against each rivet) and just hard enough gave it a nice tap. This caused the remaining part of the rivet to pop out of the hole. I was able to get all but 8 of them out by doing this method. Those remaining 8 simply sheered the top of the rivet off.
You'll want to be very very careful if you do this (you were warned!), the parts that separate the keys aren't too fragile, but you wouldn't want to have any dents or stress marks appear on the visual side, it helps if you clamp the top rest down so it doesn't move on you.
6. For the remaining rivets, I used a drill press and a 1/32" drill bit to drill the remaining rivets out. The drill bit is just smaller than the holes the screws go into, so I had to be careful not to allow the bit to move at all or the hole would be too big for the screw.
I first tried a hand drill but it was way to hard to keep the tiny drill bit in place and I ended up /w 1 hole that was too big to screw into.
The actual tool I used was the Dremel 8100 and the Dremel drill press station, together @ Home Depot with the drill bits and chuck, are less than $160 - though you could probably find a much cheaper setup on Amazon or using some other type of drill press.
Hope this helps!

 2
2  2
2 
 965
965 


1 Comment
Hellow,
I am using Mac Book Pro 15 inch retina, it has battery draining issue and Charging port burnt. I have submitted the Mac for repairing at Apple service centre, they said its need to change Top case with battery and Magsafe board 2.
My concern is that is there any need to change Top case if the problem in battery or the batteries comes along with the Top Case.
I just wanted to know can we change only battery and magsafe board 2 instead of changing Top Case with Battery.
by Nilesh