Getting Started With Items
Overview
Items are a central repository for all of the information your site has on a specific tool or part. It automatically links users with the parts and tools they need to complete a project.
Each item page contains the following information:
- Name of the item
- Type of item
- Product code (if you're selling the item)
- Summary of what the item is and what it is used for
- Image of the item (optional, but very important)
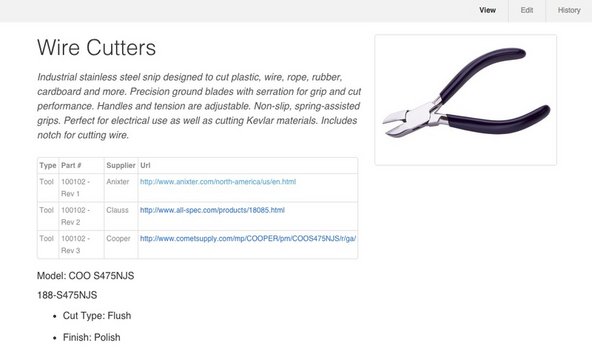
Here's an example of an item (in this case, a tool):

The difference between parts and tools may seem pretty intuitive, but sometimes it's not. As you add more guides to your site the distinction can become subtle. Here's a few guidelines that help you sort the parts from the tools.
A great example of what you can do with item pages is Gunner Automotive's Machinist's Scale page.
Item Types
Tools
Tools are implements; they interact with both parts and devices. Typically, tools don't get used up over the course of a project. You can use them again and again. Ball-peen hammers, spatulas, and hole punches are all examples of tools.
Parts
Parts, on the other hand, do get consumed over the course of a project. They can replace old parts, increase functionality of an existing object, or serve as raw materials for your project. A replacement battery for a computer, origami paper for a paper crane, and a sheet of plywood for a playhouse are all examples of parts.
Creating an Item Page
There are three ways to create an Item page.
The first way is to simply click "Item" on the New Page tool. From there, follow the format outlined in this sample Item.
If you prefer to create an item manually, type your URL, followed by /Item/Item_Name. Then, change Item_Name to the name of your tool.
For example, the link for a soldering iron should read http://"yoursite".dozuki.com/Item/Soldering_Iron. Go to that wiki and click on "Create this Article." From there, edit to your heart's content.
The third, and most common, way to create an item is to add it while you're making a guide. Simply add the part or tool in the "Required Tools/Parts" section of the "Details" tab, and an item page will be created.
Editing an Item Page
To edit an Item page, simply click on the "Edit" tab. The edit page for that particular Item will appear, and the text, pictures, and the supplier table can be edited and arranged on this page.
Parts of a Wiki Page
Title
Naming an item takes some forethought. You'll want to consider the current needs of users and the expected growth of the site. The name you currently use for an item might prove to be too broad or too specific over time.

For example, say you name an item "screwdriver". That might be great if your site only offers three different types of screwdrivers—a phillips, a slotted, and a torx. But when your site grows, you might offer a larger variety of screwdrivers for purchase. Suddenly, that item page could include hundreds of different types of screwdrivers.
On the other extreme, an item with the name "Anti-static T10 Torx Screwdriver" is too specific, and doesn't give you any room to grow. Design your items so that in the future you can add new types.
The trick is to find a middle ground between these two extremes. Item types are the way to accomplish this, separating the item name from its specification. In the above example, you might use "Anti-static" as one type of your "Torx screwdriver".
Here's a handy tip: Plan item names that encompass no more than 20 or so types. We'll talk about types in more detail below.
Summary
Summaries provide a brief idea of what part or tool this is. They show up on searches, so they are very useful for identifying an Item.

Typical content in a summary includes date of release, important specifications, and possibly an ID number.
Images

Images help users recognize the topic of a Wiki. Since the image will often be viewed as a thumbnail, it should be simple and free of clutter.
Attaching the Wiki image is quite simple. Once an image is uploaded to the Media Manager, simply drag click on the thumbnail of the image, and it will appear where the grey image placeholder was.
Images can also be put in the Additional Information text box on the Wiki page.
Item Supplier Table

Editing
When editing an item, you'll see a table labeled Suppliers. To edit a particular cell, hover over it and click to edit the cell text. When you're done, just hit "Enter". Then, "Tab" over to edit the next cell.
In edit mode, cells with no value will display with a dash, but the same cells will appear empty when viewing an item normally. The dashes just let you know that there's a cell you can edit. Add another row by clicking "Add a new row" at the bottom, left corner of the table.
Type
Item "types" are an easy way to differentiate between kinds of similar items (like a 6" and an 8" Phillips screwdriver). You can insert up to two comma-separated tags for every type of item on the Supplier's Table.
If you like, you can ignore types all together. Provide an e-commerce link with no type and it will be the default link used to purchase any resistor.
Part #
The part number is the item's SKU or other identification number. This field is used for matching uploaded products on sites with complete e-commerce integration.
Supplier
The supplier is the name of the company that you source the item from.
URL
We recommend this link to where the reader can buy the item, but it could also be a page with product information.
Permissions Manager
The Permissions Manager is a system that prohibits edits to pages from being automatically accepted if the user making the edit has less than the necessary reputation. Use the slider in this field to set the required amount of reputation to edit this Item page.
Check out these other pages for complete breakdowns on reputation and the Permission Manager.

Tags
Tags act similarly to any other tags, in that they increase search popularity by including extra words that many would think of in relation to that Item page, even though they may not be a part of the title.
To add a tag, locate the "Tags" field in the Wiki editing interface, type in the tag you want to add, and then press "Add".

Additional Information
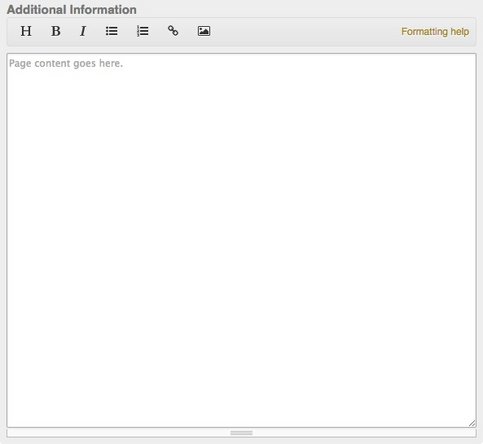
The Additional Information text box is used to give supplemental information about the item. Include more pictures of the item, further description, or relevant documents in this text field.

Organizing an Item Page
Item pages are organized by being associated with a specific guide. For more information, see our page about the Details tab of the guide editing interface.
Was this article helpful to you?
Didn't find the answer you were looking for?
Ask a QuestionYour vote has been recorded.
Tell us more. (optional)