Getting Started With Categories
Overview
A category page is just what it sounds like. It categorizes other relevant pages—sub-categories or guides—with shared characteristics onto a single page. Rather than having to search through the entire site for a specific category or guide, just locate its overarching category, and find it there. Categories are the best way to group and organize different sub-categories and guides. They also provide a general overview of the common information pertaining to all the sub-categories and guides they envelop.
Example Category Page
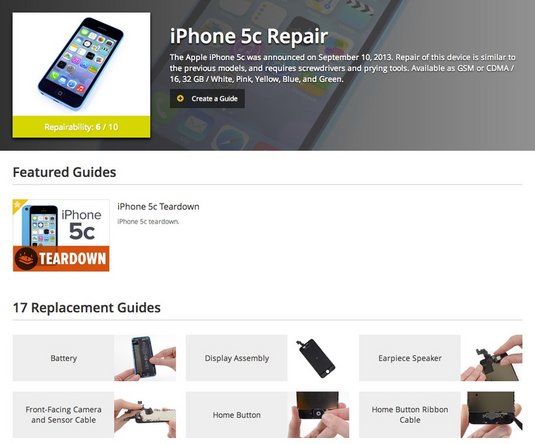
Here is an example of what a typical category page might look like:

Creating a Category Page
Category pages are very simple to create. To create a category page, simply go to the New Page Creator and select "Category"! You will then be prompted to enter the name of the category page. Make sure that you spell the name correctly and use the desired punctuation (if applicable). It is very difficult to change the name of a category page once it has been created, so having the name correct the first time is important.
Set the name, hit "Next," and you will be taken to the edit tab for the category page. Once you enter some text into one of fields and hit save, the category has been officially created and can be edited at any time.
Editing a Category Page
Like all guides and wiki pages, every category page has three tabs in the upper right-hand corner of the page.

To edit a category page, simply click on the "Edit" tab. The edit page for that particular category page will appear, and all the text, pictures, and formatting can be edited and arranged on this page.
Parts of a Category Page
Categories are great places to display information that pertains to all of the sub-categories and guides contained in a category. Generic descriptions on appearance, relevant modes of operation, and revisions are good examples of content that could appear on a category page.

Title
The title is both what a Category will be known as, and the way that people will find a category. Therefore, it is important that the Category title is appropriate for the subcategories and guides that it contains. Category titles should be broad enough to include all pertinent subcategories, but narrow enough to exclude irrelevant categories. For example, if you wanted to create a Category for Honda cars, you wouldn't want to title it "Honda Vehicles" since that might also include motorcycles and trucks. It's simply too broad, and would be increasingly hard to manage as your content grows.
On the other hand, you also wouldn't want to title it "Honda Coupés" since that would exclude four-door sedans. That's much too narrow. You'll want categories that give your content room to grow.

The Title field is automatically filled with the name that was provided when first creating the page. You can change the title to whatever you like, although this will not change the URL for the Category page. It will change the display title on the "View" tab.
Summary
Summaries provide a brief idea of what the category page is about. They show up on searches and underneath the category image, so they are very useful for identifying a category.

Typical content in a summary includes date of release, important specifications, and possibly an ID number.
Images

Images help users recognize the topic of a category page. Most people will use the category image as a form of identification, so it is important that it be general enough to cover all the sub-categories and guides that it holds, but specific enough that people can easily identify the category at a glance. Since the image will often be viewed as a thumbnail, it should be simple and free of clutter.
Attaching the category image is quite simple. Once an image is uploaded to the Media Manager, simply drag click on the thumbnail of the image, and it will appear where the grey image placeholder was.
Images can also be put in the main body of the category page. The process for adding an image to the main body of the category page is the same as adding an image to a Wiki. When images are dragged into the main body, wiki text generates for the image, allowing for the image to be easily moved and edited within the body text. To change size and alignment of an image inside the body text, add "|size=small/medium/large" or "|align=left/center/right" inside the image brackets.
Here's an example:
[image|123456|size=medium|align=left]
Permissions Manager
Categories are wiki pages, which means they are open for public editing. This is great because it allows any expert to critique or make changes to the page. However, it can be a problem if people start to abuse their editing freedom. The Permissions Manager is a system that prohibits edits to pages from being automatically accepted if the user making the edit has less than the necessary reputation. Check out these other pages for complete breakdowns on reputation and the Permission Manager.

Tags
Tags act similarly to any other tags, in that they increase search popularity by including extra words that many would think of in relation to that category, even though they may not be a part of the title.
To add a tag, locate the "Tags" field on the category page, type in the tag you want to add, and then press "Add".

Additional Information
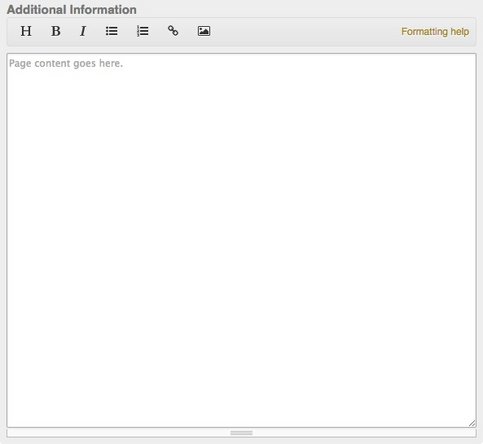
The Additional Information text box is the meat of the category page. This is the best place to put the identifying characteristics of the category and why all the sub-categories and guides belong in this particular category. This is also a great place to put interesting background information.

Start a New Guide
Every category page can house guides in addition to other categories. On every category page, you'll find a link to 'Create a Guide' below the Category's title. Hit that button to get started on a new guide that's relevant to that category. Once you've created your guide, it'll appear on that category page.
How to Organize Category Pages
To organize your category pages, visit your Management Console by navigating to `/Manage` and find the Category Manager—it's under the Content tab. New categories that haven't been organized yet will show up on the right side of the page as "Orphans." Give them a parent category by simply dragging and dropping them right on top of another category. Once you've done so, that orphan category will show up beneath the category you dragged it onto. If you've accidentally dragged your category on top of a wrong category, hit the 'undo' button at the top right.
To learn more, see our Categorization Basics page.
Was this article helpful to you?
Didn't find the answer you were looking for?
Ask a QuestionYour vote has been recorded.
Tell us more. (optional)