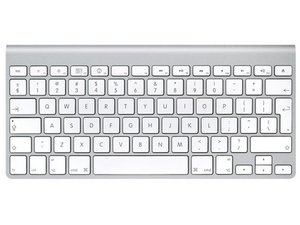
its called a lock ring too you can find in a engine repair shop. I have the tool, but the teeth were not long enough to reach the holes on the lock ring. here is an alternative
1. Get the longest screwdriver you can find, that can touch the battery and still have length showing once you put the screwdriver in the battery well. any type of tape, to tape down the wires.
2.remove plastic cover it will pop off once glue is removed. there is only 2 screws holding down the electronic board. remove the first screw, 2a, bend back slowly the soldered part that you just removed the screw from, 2b, unscrew the post.
3.there is a piece of tape the is covering the wiring lock to the circuit board. remove tape, unclip the plastic lock and pull circuit wire from the back of the board ( similar to Ipod,Iphone connection)
and push the circuit board towards the button you use to power up the keyboard. slide slowly, the battery connection is attached. once you see the connection take it off with your nail or screw driver
4.slide out circuit board, and using the some tape, tape down the circuit wire and battery wire. you can now see the lock ring.
- NOTE*** be careful and be attentive to the keyboard wire as you perform the next steps
****
5. tape the tip of the screw driver and stick the inside the battery well.you will use the screwdrive to push up the battery. put a PLASTIC BAG over the opening, because there is a spring that will pop out.
6. using the screwdriver with one or two forceful pushes, push hard and the slip ring will give way the battery will move up towards the opening over were the plastic bag is at. if the screwdriver is not long after the battery moved up, put another old battery in the well to give you an extension.
7. slowly push keep pushing up the battery until the spring and holder pop off. now the well is open and you can push the battery back down the original way it came in. REMEMBER THE KEYBOARD WIRES CAN GET DAMAGED IF YOU KEEP PUSSHING THE BATTERY FOWARD.
8. Clean corrosion and put back parts in reverse order.
I did this on 5 keyboard and the spring never broke once while i pushed. it very thick. i tried to put a picture on this but was unable.
hope this helps you
UPDATE: for battery insertion To possibly eliminate or reduce a future battery acid leak, i put 1 pieces of duck tape around each area were the batteries touch +/-. if you put to much the batteries will not slide in the battery well. I am hoping that this will contain as much acid leak as possible should it occur again


 5
5  10
10  1
1 


35 Comments
i have spent all day trying to remove a battery from my number key pad. only bought it 6 weeks ago, then it stopped working to find that the battery had got stuck,(corrosion) i used wd40 and baking soda........ and some strong tapping it on ground.
drying it out now on radiator. fingers crossed it works i am going to use the tip of covering the battery with duck tape....
by stella
Lifesaver - Just managed to clean up my wireless keyboard. Toughest part was getting the plastic cover off. Many thanks!
by dorsher
After reading all of these solutions and being intimidated to take my keyboard apart...I put two batteries in on top of the corroded battery and pushed down on them really hard. It dislodged the stuck battery and you could feel the resistance of the spring. Then all 3 slid right out and I was able to put 3 new batts in and now it works. Yay.
by elizabethcwells
way too hard,just use a knife to compress the spring, then another knife to hold back the plastic battery contact.
then while holding it back use a small wire or whatever to push the battery out
no dis-assembly required
by pipefighter
what if i cant unscrew the battery cap. its so bad its stripping
by daniellejstephens
Show 30 more comments