See that little red blip on the map—waaaaay up there in Northern Quebec? Over there, at the mouth of the Great Whale River? Go ahead and zoom. And keep zooming. We’ll wait … there you go.
That’s Jamie Frendo-Cumbo. He lives up in the Kuujjuaraapik area—a very small, very remote community on the southeastern shore of Hudson Bay in Canada. Kuujjuaraapik is off the beaten path. Literally. As in there are no roads to Kuujjuaraapik. The only way in or out of town is by plane or boat. As you can imagine, there’s also not a lot of what you’d call organized entertainment in a town so remote. You’ve got to make your own fun.

“Life in the North gets boring and routine. You need to find ways of keeping yourself occupied during the circumpolar winter or you’re liable to go a little screwy (pun absolutely intended),” Jamie told us via email.
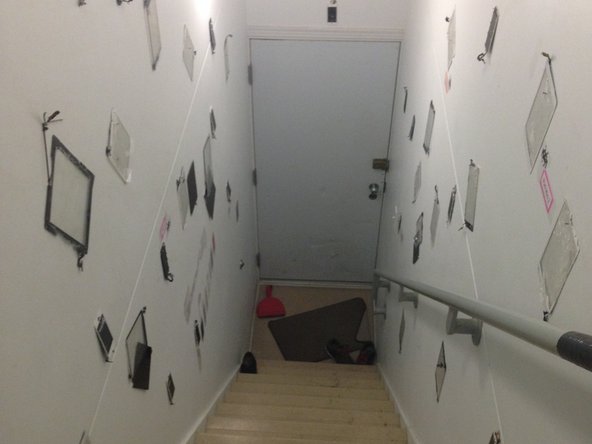
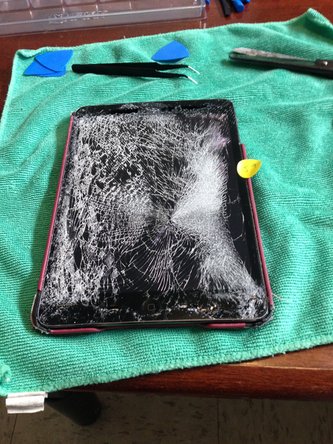
To keep from “going screwy” Jamie turned to unscrewing. Devices that is. He went on a three-month repair binge—fixing broken iPods, iPads, and iPhones in his community. In 90 days, Jamie fixed 60 devices.

“In my isolated town, there is no Apple Store to speak of. There’s no glassworkers or metalshapers, there are no battery disposal points or used electronics drop-off centers. We can’t even recycle,” Jamie said. “With nobody else having both the know-how and the time, it felt only natural to step up and become the town’s Repair Guy.”
This isn’t necessarily out of Jamie’s character. He’s always been the sort that tinkers for fun. At age 11, he replaced the hard drive on an old Intel 486—and he’s been pulling his electronics apart ever since. In between working as a tutor, a high school teacher, and night-club manager, Jamie, 30, occupies his time “helping people unfreeze their iPods” and “jarring PCs out of boot loops.” Then one day, someone asked if he could replace a broken iPhone screen. And Jamie decided to give hardware repair a whirl.
“Once I decided to start physical repair of the devices, it was like an addiction. All the nerdiest bits of my engineering mind, my math mind, my sci mind, my tech mind, they ganged up on me. It wasn’t even fair. It was like dopamine warfare,” he said.
His first repair—an iPhone 5c screen swap—was a rush (“I’ll never forget it,” he said). He shared his repair experiences with our community on iFixit Stories. And, he kept repairing. And he kept repairing. And kept repairing. iPhone 6 display swap? No big deal. iPod Touch 6 display assembly repair? Sure, why not? Busted iPads? Bring it on.

Q: What was the most difficult repair you did?
I found that the first few times I fixed an iPod Touch, connecting the (new) screen always took way longer than I expected. The placement of the logic board/wifi antenna, combined with the finger gymnastics needed to apply good force to the new cables and connectors, always did my head in. It’s still a step I dread but now, muscle memory plays a strong part in helping speed it along.
Q: Which repair was easier than you expected?
The first time I fixed an iPhone 6s, I was anticipating a lot of fight after some messiness with a regular 6. But, in fact, iPhones are some of my favorite devices to work on now. It just feels like they were designed with repair in mind, the modules are very accessible and clearly delineated. Even a novice would have fun and learn lots fixing an iPhone.
Q: What’s the most useful tools in your arsenal of precision repair tools and supplies?
For iPhones: the iSclack. More specifically, the little white sticky sheets that come with it. Stuff works three times better than packing tape [for giving the iSclack a smooth service to grab on when working with shattered screens].
For iPods: opening cards. They make the battery removal almost negligible—arguably the finickiest part aside from reattaching the new screen connectors.
For iPads: Kapton (polyimide) tape. I used to put it on Minis as a fix-on-return. Now, I put it on every time, de rigeur, and obviate the whole GhostTouch nonsense altogether.
Overall: That goofy looking head-mounted magnification/illumination combo with the loupe. It makes you look like the dude from Toy Story 2 (“Ya can’t rush art!”), but it’s indispensable, and my eyes say thank you.
Q: What about DIY repair resonates with you?
Before the advent of replaceable parts some two or three hundred years ago, we had to throw the baby out with the bathwater every time a support leg splintered. Now it’s just too easy to make things modular—why would we not repair? I found a lot of sentiments resonated with me after reading the iFixit repair manifesto: Repair saves cash. Repair creates jobs. Repair instills ownership. Repair makes you feel like you’re amazing because you’ve taken a broken $600 piece of high-tech electronics, and changed it from a paperweight into a functioning tool again.

You tend to learn a lot about devices when you spend a ton of time teaching yourself how to fix them. Even when you mess up the repair, you still learn something. You get a feel for the device—its complexities and particular quirks. And then the next repair is a little easier. With 60 iRepairs under his belt, here’s Jamie’s advice for other fixers:
- At the very least you will need safety goggles, tape, picks, spudgers, tweezers, a suction cup, and a screwdriver. Mostly everything else is optional, but some options are more useful than others (e.g. magnification, light source, etc).
- The first time you fix a device, allow yourself twice or even three times the suggested repair time. You will make mistakes, you will hit snags, and you will find yourself confused and need to refer to a repair community.
- Be patient. These are high-end electronics and you need to proceed carefully. Think of yourself as a surgeon: you need calm nerves and a steady hand. Avoid caffeine and nicotine when performing a repair step that requires high levels of fine motor coordination.
- Don’t forget to check the edits and the comments when using an iFixit guide. If you find a step difficult or confusing then chances are, somebody else has too, and there may be some insight you can find here online.
- You may find it helpful to take pictures of the teardown as you perform it, to make the reassembly easier. Bonus: you can then post a story on iFixit and share with the world.
Jamie ran out of Apple devices to fix in his community, but he’s not retiring his spudger just yet. He plans on teaching some of the kids in Kuujjuaraapik how to repair their devices, too. “Once I’m gone from the town, I’d love if the repair mindset (rather than the replace mindset) stayed behind,” he says.


0 Comments