Removing a Cracked Front Panel

What you need

Video Overview

    • If your display glass is cracked, keep further breakage contained and prevent bodily harm during your repair by taping the glass.

    • Lay overlapping strips of clear packing tape over the iPad's display until the whole face is covered. For particularly bad breaks, you may need to lay down two layers.

    • This will keep glass shards contained and provide structural integrity when prying and lifting the display.

    • Do your best to follow the rest of the guide as described. However, once the glass is broken, it will likely continue to crack as you work, and you may need to use a metal prying tool to scoop the glass out.

    • Protect your eyes! This procedure will cause small pieces of glass to fly directly toward your face. Do not attempt without safety glasses.

  1. Removing a Cracked Front Panel, iOpener Heating: step 2, image 1 of 2 Removing a Cracked Front Panel, iOpener Heating: step 2, image 2 of 2
    • We recommend that you clean your microwave before proceeding, as any nasty gunk on the bottom may end up stuck to the iOpener.

    • Place the iOpener in the center of the microwave.

    • For carousel microwaves: Make sure the plate spins freely. If your iOpener gets stuck, it may overheat and burn.

  2. Removing a Cracked Front Panel: step 3, image 1 of 1
    • Heat the iOpener for thirty seconds.

    • Throughout the repair procedure, as the iOpener cools, reheat it in the microwave for an additional thirty seconds at a time.

    • Be careful not to overheat the iOpener during the repair. Overheating may cause the iOpener to burst.

    • Never touch the iOpener if it appears swollen.

    • If the iOpener is still too hot in the middle to touch, continue using it while waiting for it to cool down some more before reheating. A properly heated iOpener should stay warm for up to 10 minutes.

  3. Removing a Cracked Front Panel: step 4, image 1 of 1
    • Remove the iOpener from the microwave, holding it by one of the two flat ends to avoid the hot center.

    • The iOpener will be very hot, so be careful when handling it. Use an oven mitt if necessary.

  4. Removing a Cracked Front Panel, Alternate iOpener heating method: step 5, image 1 of 2 Removing a Cracked Front Panel, Alternate iOpener heating method: step 5, image 2 of 2
    • If you don't have a microwave, follow this step to heat your iOpener in boiling water.

    • Fill a pot or pan with enough water to fully submerge an iOpener.

    • Heat the water to a boil. Turn off the heat.

    • Place an iOpener into the hot water for 2-3 minutes. Make sure the iOpener is fully submerged in the water.

    • Use tongs to extract the heated iOpener from the hot water.

    • Thoroughly dry the iOpener with a towel.

    • The iOpener will be very hot, so be careful to hold it only by the end tabs.

    • Your iOpener is ready for use! If you need to reheat the iOpener, heat the water to a boil, turn off the heat, and place the iOpener in the water for 2-3 minutes.

  5. Removing a Cracked Front Panel, Removing a Cracked Front Panel: step 6, image 1 of 1
    • Use your hot iOpener to heat up all four edges of the front panel. Let the iOpener rest on each edge for at least 90 seconds, microwaving for 30 seconds at a time as needed.

    • Take your time and ensure the entire bezel is warm. The more time you spend on this, the less time you'll spend picking out glass shards in the next steps.

    • Once all of the adhesive is warmed, pick out the edge with the largest uncracked section of glass.

    • Try using a suction up to pull up on this section, and then wedge a guitar pick beneath the glass.

    • If the glass is too badly cracked for the suction cup to grab, apply more heat and force the pick in, careful not to damage the LCD.

  6. Removing a Cracked Front Panel: step 7, image 1 of 2 Removing a Cracked Front Panel: step 7, image 2 of 2
    • Work your way around the entire perimeter of the front panel with an opening pick.

    • Much of the glass around the bezel will break off from the rest of the panel, and will stay adhered to the rear case of the iPad. Work your way past these pieces to free as much of the glass panel as possible.

    • When you get to the digitizer and (on iPad 4) home button cables, you may find it helpful to cut these cables, rather than risk ripping them out of their sockets and damaging the logic board.

    • Remove the taped-together glass panel from the iPad. Be careful as this will have sharp edges and may drop pieces of glass. Dispose of safely.

  7. Removing a Cracked Front Panel: step 8, image 1 of 3 Removing a Cracked Front Panel: step 8, image 2 of 3 Removing a Cracked Front Panel: step 8, image 3 of 3
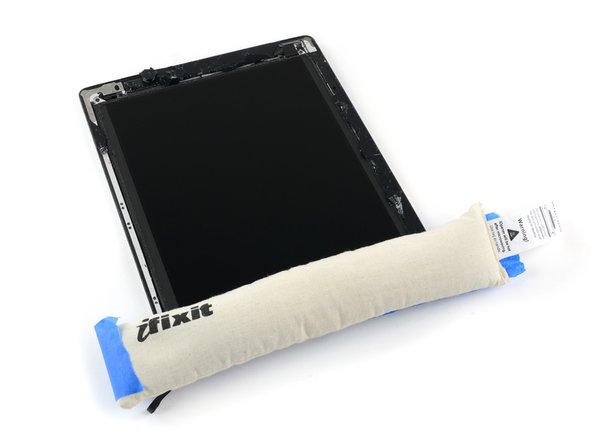
    • For the next step, you'll need to apply your iOpener directly to the broken glass left adhered to the iPad.

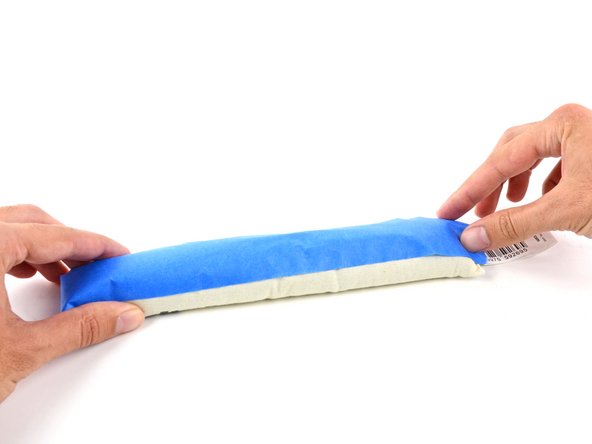
    • To protect your iOpener from the glass and keep it from filling with glass dust, stick some masking tape to one side.

    • Heat the iOpener and apply it to one edge of the iPad, directly on top of the pieces of glass that are still adhered to the rear case of the iPad.

    • Leave the iOpener there for at least 90 seconds, to soften the adhesive holding these small pieces in place.

    • Be careful not to touch or otherwise disturb the LCD.

  8. Removing a Cracked Front Panel: step 9, image 1 of 2 Removing a Cracked Front Panel: step 9, image 2 of 2
    • Did you take off your safety glasses? If so, put them back on now. Seriously.

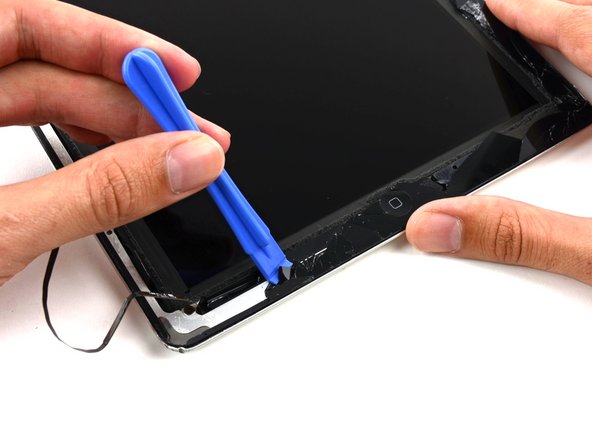
    • Grab your favorite plastic tool and start prying out the remaining pieces of glass from the iPad frame.

    • This is a slow and tedious process, but benefits greatly from heating the adhesive.

    • There is a serious risk of cutting yourself while working with this glass. Work slowly and with controlled force. You may wish to wear thin leather gloves.

    • Remove all of the glass and residual adhesive and continue your repair.

Conclusion

To reassemble your device, follow these instructions in reverse order.

16 other people completed this guide.

Andrew Optimus Goldheart

Member since: 10/17/2009

492,829 Reputation

411 Guides authored

Team

iFixit Member of iFixit

Community

142 Members

16,653 Guides authored

0 Comments

Add Comment

View Statistics:

Past 24 Hours: 1

Past 7 Days: 26

Past 30 Days: 122

All Time: 10,448