
What you need

This teardown is not a repair guide. To repair your LED Birne 230V, use our service manual.

  1. LED Light Bulb Teardown, Removing Diffuser: step 1, image 1 of 3 LED Light Bulb Teardown, Removing Diffuser: step 1, image 2 of 3 LED Light Bulb Teardown, Removing Diffuser: step 1, image 3 of 3
    • Carefully cut and pry with razor blades between the diffuser and body of light bulb

    • Diffuser is sealed onto body of bulb

  2. LED Light Bulb Teardown, Body without Diffuser: step 2, image 1 of 2 LED Light Bulb Teardown, Body without Diffuser: step 2, image 2 of 2
    • 15 LEDs spread in ring

  3. LED Light Bulb Teardown, Cross section of body: step 3, image 1 of 3 LED Light Bulb Teardown, Cross section of body: step 3, image 2 of 3 LED Light Bulb Teardown, Cross section of body: step 3, image 3 of 3
    • Filing into the side of the bulb

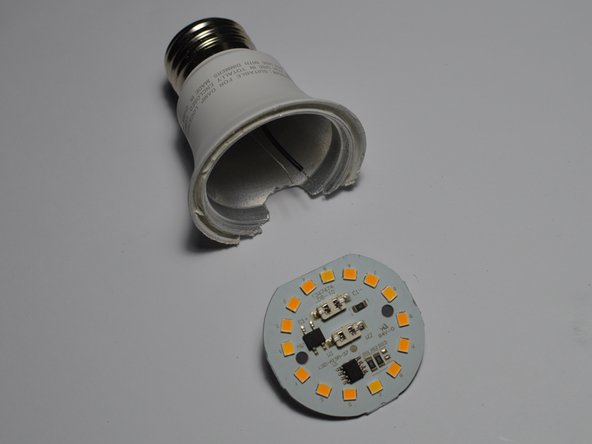
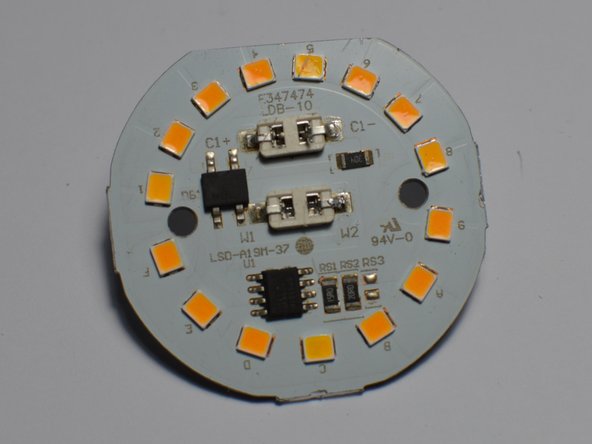
    • Top layer is circuit board

    • V-shaped metal is casing about 1mm thick

  4. LED Light Bulb Teardown, Removing Circuit Board: step 4, image 1 of 3 LED Light Bulb Teardown, Removing Circuit Board: step 4, image 2 of 3 LED Light Bulb Teardown, Removing Circuit Board: step 4, image 3 of 3
    • With open gap circuit board can be removed

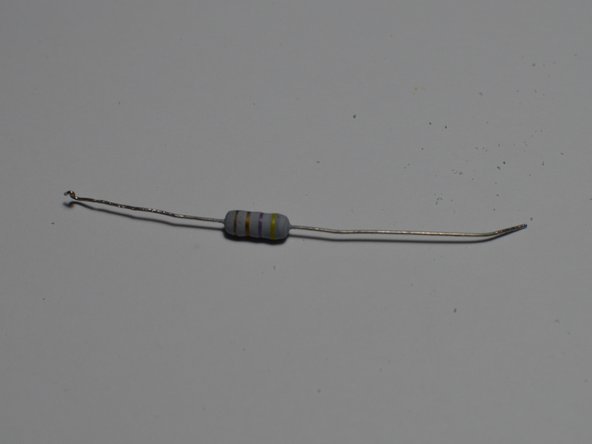
    • Attached with wire and resistor to base of bulb

    • Release clips to release wires

  5. LED Light Bulb Teardown, Remove Capacitor: step 5, image 1 of 3 LED Light Bulb Teardown, Remove Capacitor: step 5, image 2 of 3 LED Light Bulb Teardown, Remove Capacitor: step 5, image 3 of 3
    • Capacitor is removed as previous wires in Step 4 were removed

    • Capacitor is 10 mircoFarads

  6. LED Light Bulb Teardown, Remove Resistor: step 6, image 1 of 3 LED Light Bulb Teardown, Remove Resistor: step 6, image 2 of 3 LED Light Bulb Teardown, Remove Resistor: step 6, image 3 of 3
    • Resistor removed by popping of bottom cap

    • Resistor is 4.7 ohms

  7. LED Light Bulb Teardown, All Parts: step 7, image 1 of 3 LED Light Bulb Teardown, All Parts: step 7, image 2 of 3 LED Light Bulb Teardown, All Parts: step 7, image 3 of 3
    • Parts laid out and details

Wiley

Member since: 01/08/2023

51 Reputation

7 Guides authored

0 Comments

Add Comment

View Statistics:

Past 24 Hours: 5

Past 7 Days: 55

Past 30 Days: 138

All Time: 137