Introduction
Samsung recently unveiled two new updates to its smartwatch line in the Galaxy Watch4 and the Galaxy Watch4 Classic. Though externally similar to last year’s Watch3, there’s a good chance of internal differences—and we’re here to sniff those out. Time for a teardown!
Be sure to follow iFixit’s YouTube channel, our Instagram, and our Twitter, and subscribe to our newsletter so you’ll be the first to know when the newest consumer tech hits the teardown table.
What you need
-
-
It’s specs o'clock—let’s see what upgrades these new Samsung wearables have to offer your wrist:
-
Exynos W920 1.18 GHz with dual ARM Cortex-A55 cores, low-power Cortex-M55 display processor, Mali-G68 GPU, and integrated LTE
-
Circular Super AMOLED display with always-on functionality—1.19 inch or 1.36 inch sizes available in both models (330 PPI)
-
1.5 GB RAM and 16 GB internal memory
-
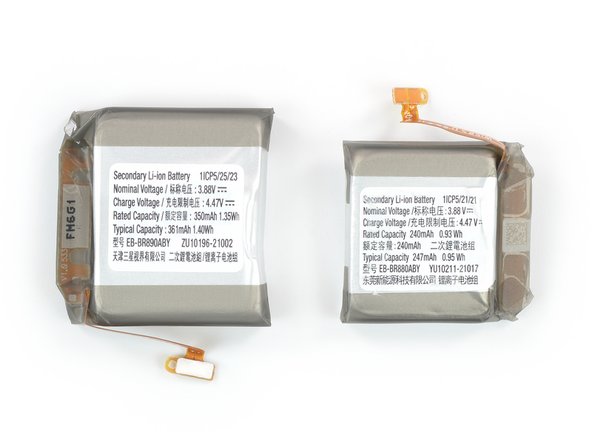
A 361 mAh battery in the larger variants, like our Watch4 Classic (46 mm)—and a 247 mAh battery in the smaller ones, like our Watch4 (40 mm)
-
A bag full of sensors: accelerometer, barometer, gyro, geomagnetic, light, optical heart rate, ECG, bioelectrical impedance sensor, and a Hall sensor on the Classic
-
IP68 rating with water resistance to a depth of 50 meters (5 ATM)
-
-
-
Though the Galaxy Watch4 and the Galaxy Watch4 Classic have almost identical specs, they're each rockin' their own look:
-
Keeping the rotating bezel from the Watch3, the Watch4 Classic is a bit bulkier. If you prefer something less obtrusive, the standard Watch4 bears more resemblance to Samsung's Active line or the Xiaomi Mi Watch 2021.
-
While the Galaxy Watch4 always wears aluminum, the Classic has some classy frame options: 316L stainless steel or titanium (also seen in space).
-
-
-
Before we crack our watches open, we pull in their predecessor—a.k.a. the Watch3—to look for any differences:
-
Both the standard and Classic Watch4 models sport sleek, rectangular buttons—rather than the round ones seen on the Watch3.
-
The introduction of the new Bioelectrical Impedance Analysis sensor on the back of the Watch4 doesn't change the hardware layout. But what’s missing is the service port hatch seen at the top of the Watch3 (third photo, center).
-
-
-
After all that time spent poking around the outside, we're ready to start poking at these watches' insides.
-
Both models open up through the back, same as the Watch3: Four tri-point screws stand in the way, which a specialty driver easily takes care of. Then a quick pry from an Opening Tool gets us inside.
-
Compared to the relatively integrated rear assembly of the Watch3, the Watch4 offers up a few more bits for early removal: the flex cables themselves, and what seems to be a wire to measure your body composition.
-
The only silicon we spot here is the Texas Instruments AFE4500S, which handles the optical biosensing.
-
-
-
-
If you liked that little taste of a biosensing chip from the last step, have we got a treat for you: more chips!
-
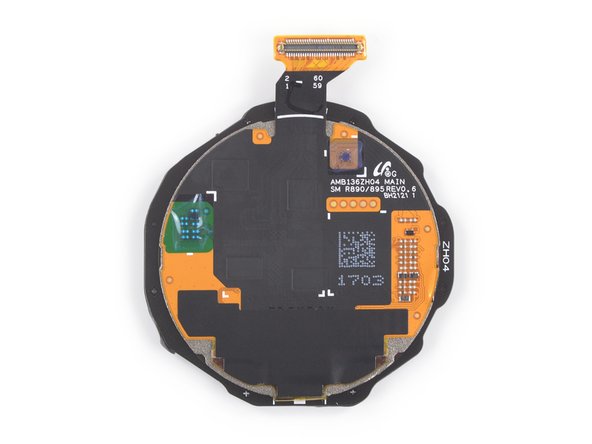
It takes some unscrewing and some spudgering, but the motherboards are out—Watch4 Classic on the left, and Watch4 on the right.
-
Samsung package combining the Exynos W920 dual-core 1.18 GHz processor with (what seems to be?) 1.5 GB of their in-house LPDDR4
-
Samsung Shannon 915 intermediate frequency IC
-
Broadcom BCM43013 ultra low power dual-band 802.11n Wi-Fi and Bluetooth 5.0 combo IC
-
Qualcomm Atheros QPA5580 power amplifier (likely)
-
-
-
Bonus round! The back of the Watch4 Classic motherboard doesn't give us anything to work with, but the Watch4 shows us a couple more of those same chips:
-
S915 intermediate frequency IC
-
Broadcom BCM43013 ultra low power dual-band 802.11n Wi-Fi and Bluetooth 5.0 combo IC
-
We'd guessed from the data sheets that these watches are similar, and well … they are. Silicon-wise, there doesn't seem to be anything differentiating the two.
-
-
-
The watches' fuel tanks are hidden under the motherboards and nestled within plastic midframes.
-
The Watch4 Classic 46 mm accommodates a 1.40 Wh (361 mAh @ 3.88 V) battery—while its 40 mm little sister, the Watch4, houses a 0.95 Wh (247 mAh @ 3.88 V) battery.
-
We shake the last components out of the midframe and find a familiar vibration motor next to the barometric sensor.
-
But the most interesting part is the button flex cable. It not only carries a microphone (#snore-tracking), but is equipped with an additional contact plate opposite its connector. This allows the watch to close an electrical circuit through your body for bioelectric impedance analysis.
-
-
-
Most of the Galaxy watches that pass through our hands are—in contrast with other smart watches—screen repair friendly. The Galaxy Watch4 series maintains that streak … at least half-way.
-
The Watch4 Classic, like the Watch3, prioritizes simple display removal. With a little heating, we're able to separate the circular AMOLED screen from the frame with the push of a finger.
-
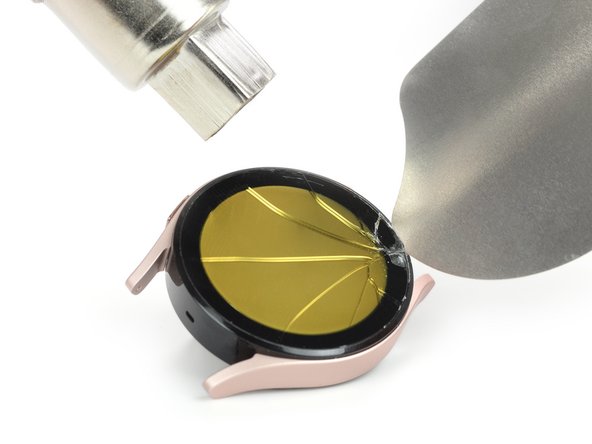
Unfortunately, the standard Watch4 isn't so friendly. This time we're forced to grab our heating and prying tools to take on that screen.
-
And we're rewarded with cracked display glass and a toasted yellow AMOLED. At least the screen isn't blocking access to any other repairs—if you're prying the screen off, it's probably already broken.
-
- Opening is straightforward and requires some prying—but no heat.
- The batteries are easily accessible and use only mild adhesive.
- With a little heat, the display of the Watch4 Classic can be removed without any additional tools.
- Only two types of screws are used, although the back cover screws are uncommon tri-points.
- The watches are both very modular, with only the rear sensors being buried inaccessibly in the back cover.
- The display of the Watch4 sits stubbornly in the frame and seems impossible to remove without damaging it.
Final Thoughts
Repairability Score


(10 is easiest to repair)
8 Comments
Where to find Galaxy 4 replacement screen?
Unfortunately we haven't found any replacement parts yet. If you find a website that offers replacement parts feel free to share your experience with the iFixit community.
my watch went through the washing machine and the drier can you still fix it after it was in washing machine and the drier
A good overview, but you did not show the removed bezel as it was with the SM-R800.
I didn't have to put the R800 bezel on my Watch4(R890), but it doesn't work. Installed perfectly, rotation and clicks are even nicer than with the original. Hall detectors are in good working order, because react to an external magnet.
I wanted to compare the arrangement of magnets on the bezels from R800 and R890.


